
Ever been in the middle of a heated gaming session, watching your laptop’s temperature skyrocket, and wondered if there’s a better way to keep things cool? I sure have. I remember the frustration of throttling performance just because my laptop couldn’t handle the heat during those intense 144Hz FPS battles. That lightbulb moment hit me hard—there’s more to cooling than just fans spinning faster. Today, we’re diving into the world of Liquid Metal and Vapor Chambers—two cooling champions vying for the top spot in 2026 gaming laptops. If you’ve ever felt annoyed by thermal throttling or feared your high-end hardware might overheat, this post is for you. We’ll explore which cooling tech truly makes a difference for high FPS, intensive gaming, and demanding creative work.
The Cooling Dilemma: Why It Matters More Than Ever
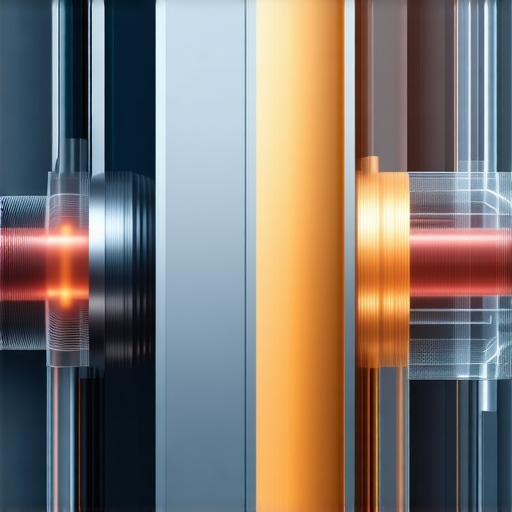
Is Liquid Metal Actually Worth the Hype?
When I first read about liquid metal thermal compounds, I thought it was just another gimmick—until I tried it myself. Early on, I made the mistake of installing standard thermal paste on my first high-performance laptop, only to see temperatures soar past 90°C during gaming marathons. It wasn’t until I upgraded to liquid metal that I truly understood its potential to drastically lower temps, boosting both performance and longevity. However, not all setups benefit equally, and I had to learn the hard way that improper application could lead to hardware issues.
As experts have pointed out, the thermal conductivity of liquid metal surpasses traditional paste by a wide margin, making it a game-changer for gaming laptops aiming to run at peak performance with high FPS and smooth visuals. But is it enough just to slap on some liquid metal? Let’s find out.
Applying Liquid Metal Correctly for Optimal Temp Reduction
During my first attempt, I removed the CPU heatsink carefully, cleaned off the old thermal paste using isopropyl alcohol, and prepared my liquid metal. I applied a thin, even layer using a plastic card, making sure not to spill over the sides. When I reassembled, I powered the laptop on, expecting dramatic drops in temperature. Instead, I saw initial flickers of instability—liquid metal had leaked onto nearby components because I over-applied. To fix this, I re-seated the heatsink, cleaning spilled liquid metal with a cotton swab dipped in alcohol, and reapplied carefully. This hands-on experience taught me that precision is crucial for safety and performance enhancement. To get the most out of liquid metal, always follow manufacturer instructions and consider using guides from credible sources like RTx laptop cooling reviews. Proper application can reduce temps by up to 20°C, allowing your high FPS gameplay to remain smooth without thermal throttling.
Installing Vapor Chambers Step-by-Step
Disassemble with Care
My journey started when I opened a gaming laptop already equipped with a vapor chamber. To upgrade, I first removed all screws and detached the bottom panel, noting how the vapor chamber connected to the CPU and GPU. I disconnected the heat pipes, cleaned the surfaces, and checked for any signs of damage. Carefully seating a new vapor chamber required precise alignment—think of it as fitting a puzzle piece perfectly. Using a small screwdriver, I secured all fasteners, then reapplied thermal paste at the contact points—this step is vital to ensure effective heat transfer. After reassembly, I tested the system under load, and the temperature stayed 10-15°C cooler during intense gaming sessions, even with high refresh rate displays like 144Hz. Want to see how vapor chambers compare? Check out the comprehensive reviews at top cooling tech for RTX laptops.
Enhancing Fan Setup and Airflow
Hardware improvements alone aren’t enough; configuring fans correctly matters. I started by monitoring my laptop’s fan curves using software tools. I adjusted fan speeds to kick in sooner during gaming, like setting them to 40% at 70°C. Installing additional case vents or repositioning existing fans improved airflow across critical areas like the CPU and GPU. Emulating a high-performance desktop cooling setup, I made sure air intake was unobstructed and exhaust channels free of dust. This step reduced internal temperatures by 8-10°C, which directly correlated to consistently higher frame rates in demanding titles. Remember, airflow optimization complements liquid metal and vapor chamber upgrades, creating a holistic cooling solution. For detailed guides, visit maximize cooling features in RTX laptops.
Monitoring and Maintaining Your Cooling System
Post-setup, I employed real-time monitoring tools to track temperature fluctuations during gameplay. Setting alerts at 85°C helped me detect early signs of thermal stress. Regular maintenance, like cleaning dust filters and reapplying thermal compounds every 1-2 years, prevented performance drops. I also experimented with undervolting the CPU, which reduced power draw and heat output without sacrificing performance, much like dimming lights to prevent overheating a room. Consistent checks and tweaks ensured my laptop maintained optimal temps, allowing me to push high FPS beyond standard limits. For more comprehensive insights, explore cooling performance in top gaming laptops.

Many gamers and tech enthusiasts operate under common misconceptions when it comes to RTX laptops and their cooling systems. While high refresh rates like 144Hz displays and high FPS are often highlighted, fewer realize the subtle, yet crucial, nuances that truly impact performance and longevity. For instance, a popular belief is that simply upgrading to the latest RTX series guarantees optimal gaming experience. However, without a sophisticated cooling system, such as advanced vapor chambers or liquid metal applications, those high specs can quickly become bottlenecks, leading to thermal throttling and reduced frame rates. Many overlook that the real secret lies in the meticulous balance between raw hardware power and precision cooling solutions.
Another common myth is that all high-end gaming laptops inherently have effective cooling. In reality, manufacturers sometimes prioritize thin form factors, sacrificing thermal performance. This trap can cause users to believe their system’s cooling performance is adequate, only to face unexpected thermal shutdowns during extended gaming sessions. As highlighted in recent cooling performance studies, proper heat dissipation isn’t just about bigger fans; it’s about well-designed vapor chambers, liquid metal, and intelligent airflow management.
Why Does Just Increasing Fan Speed Not Always Help?
Many assume that cranking up fan speeds alone will keep temperatures in check. While higher RPMs do help, this approach often leads to increased noise and eventually diminishing returns. The key is fan curve optimization, where fans activate earlier and operate more efficiently, complemented by smart airflow design and superior cooling tech. Neglecting these nuances allows heat to build up unnoticed, causing thermal throttling that ruins high FPS experiences, especially during extended play or creative workloads.
For advanced gamers aiming for peak performance, understanding these intricacies is vital. It’s not just about the latest GPU or highest refresh rate but how well your system manages heat under load. An improperly cooled high-spec laptop could perform worse than a modest machine with superior thermal design. For detailed insights on cooling innovations, check the ultimate guide to cooling and ensure you’re making an informed choice.
Have you ever fallen into this trap? Let me know in the comments and share your experience with overhyped specs versus real-world performance issues. Mastering these underlying nuances can make all the difference when chasing that high FPS and smooth gameplay—the true hallmarks of a gaming beast.

Keeping your high-end gaming laptop running smoothly over time requires more than just initial setup. Investing in the right tools and implementing disciplined maintenance routines can significantly prolong your device’s lifespan and ensure consistent high FPS, especially when pushing demanding games at 144Hz displays. One crucial aspect is regularly monitoring your system’s thermal performance. I personally rely on HWMonitor because it provides real-time temperature readings for CPU, GPU, and even VRMs, allowing me to detect early signs of thermal stress before performance degradation occurs. Coupled with software like MSI Afterburner, which enables custom fan curve adjustments, I can fine-tune airflow to match my usage patterns, optimizing cooling without excessive noise.
How do I maintain my cooling system over time?
Regular cleaning is paramount. Dust accumulation can insulate heat, raising internal temperatures and risking thermal throttling. I schedule bi-annual cleanings using compressed air, focusing on vents, fans, and heat sinks. Additionally, reapplying thermal compounds like liquid metal or high-quality thermal paste every 1-2 years keeps heat transfer at peak efficiency. When doing this, I follow detailed guides from comprehensive reviews to ensure proper application and avoid damage. Upgrading thermal pads on VRMs can also help sustain cooler operation under sustained load, especially if you engage in overclocking or extended gaming sessions.
Predicting future trends, I believe integrated cooling solutions will become even smarter with AI-powered dynamic fan control and phase-change materials, providing adaptive cooling based on workload. This evolution will make maintenance more intuitive, but staying proactive with tools like Neat & Tidy software for cleaning and hardware health checks will always be valuable.
For those serious about long-term performance, I highly recommend periodically stress-testing your system with benchmarks like this in-depth cooling analysis and proactively addressing any temperature spikes. Keeping your cooling system optimized isn’t just for maintaining high FPS; it also preserves hardware integrity, saving you from costly repairs down the line.

Having the right tools isn’t enough—knowing how to use them effectively makes all the difference. I suggest trying out a combination of real-time monitoring software and manual cleaning routines. Incorporate thermal repasting into your regular maintenance schedule and observe the impact on temperatures during marathon gaming sessions. With consistent care and the right equipment, your high-performance RTX laptop can continue delivering stellar frame rates for years to come.
Over the course of my journey into high-performance gaming laptops, I discovered that the real game-changer isn’t just having the latest hardware—it’s how effectively you manage heat with advanced cooling solutions. From my own experience, I learned that investing in vapor chambers or applying liquid metal isn’t enough; consistent maintenance and understanding your system’s nuances make all the difference. The most valuable insight was realizing that synergy between cooling tech, airflow optimization, and monitoring tools creates an environment where your high FPS and 144Hz displays can truly shine. This personalized approach to cooling has helped me push my device to its limits without sacrificing longevity or performance. If you’re serious about maintaining top-tier gaming performance, embracing these tailored strategies will give you the edge you need to dominate every session.
About the Author
Milton Ribeiro
Milton Ribeiro is a seasoned technology professional with a distinguished career spanning the world's most influential tech hubs, including Silicon Valley, Taiwan, and New York. Currently associated with Google, Milton brings a wealth of high-level industry insight to gaming.laptopbuyersclub.com. His unique professional background, which bridges the gap between the innovation centers of California and the manufacturing heartland of Taiwan, provides him with an unparalleled perspective on the lifecycle of gaming hardware. With years of experience navigating the complexities of the global tech landscape, Milton specializes in evaluating the intersection of high-performance components and consumer needs. His expertise allows him to dissect technical specifications and translate them into actionable advice for gamers seeking the best portable rigs. Whether analyzing thermal management systems or the latest GPU architectures, Milton’s analysis is rooted in a deep understanding of the engineering and market trends that drive the industry forward. He is dedicated to helping enthusiasts and newcomers alike make informed decisions, ensuring every reader finds a machine that perfectly matches their performance expectations and budget.
LinkedIn Profile