
I remember the exact moment it hit me. I was deep into a gaming session on my high-end RTX laptop, my heart pounding as I watched my frame rates dip unexpectedly. That sizzling-hot laptop, with fans screaming louder than a jet engine, was struggling to breathe. It felt like battling a stubborn beast every time I clicked ‘Play’. If you’ve ever experienced thermal throttling, you know the frustration—your machine’s raw power held hostage by heat. But here’s the lightbulb moment I had: what if a tiny change could turn things around completely?
Why Cooling Could Be the Game-Changer You Need
The truth is, thermal management is often the overlooked hero in gaming performance. When your laptop’s internal temperatures spike, especially in RTX laptops that push realistic graphics and high FPS, it starts throttling—cutting back on power to avoid damage. That means lower FPS, stuttering gameplay, and a frustrating experience. Many gamers just assume their machines are running as hot as they can handle—until they discover that effective cooling tweaks can make all the difference. I learned this the hard way early on, by constantly battling heat-induced lag without knowing I was making a critical mistake: ignoring the cooling system’s potential. Instead of rushing to upgrade my hardware again and again, I found that simple mods, like adding a honeycomb pattern for better airflow, could fix this issue for good.
Is a Honeycomb Fan Mod Really Worth the Hype?
Initially, I was skeptical. I’ve tried aftermarket coolers, thermal pads, and liquid metal, thinking bigger solutions meant better results. But those often come with risks or costs. The honeycomb mod, which involves customizing your laptop’s internal airflow pattern, sounded too good to be true. Still, I decided to test it after reading stories from other enthusiasts. The results? Spectacular. Temperatures dropped by an average of 10-15 degrees Celsius, and my performance stayed stable even during intense gaming marathons. It was a revelation—simple, cost-effective, and surprisingly effective. I want you to experience that breakthrough too.
Before diving into my step-by-step guide, I want to caution you about a common mistake I made early on: neglecting the importance of proper airflow design. Rushing into hardware mods without understanding your laptop’s airflow can do more harm than good. For comprehensive insights on cooling features and how to optimize your RTX laptop, check out this guide. Now, let’s explore how a simple honeycomb mod can help you banish thermal throttling permanently and bring your gaming performance back from the edge.
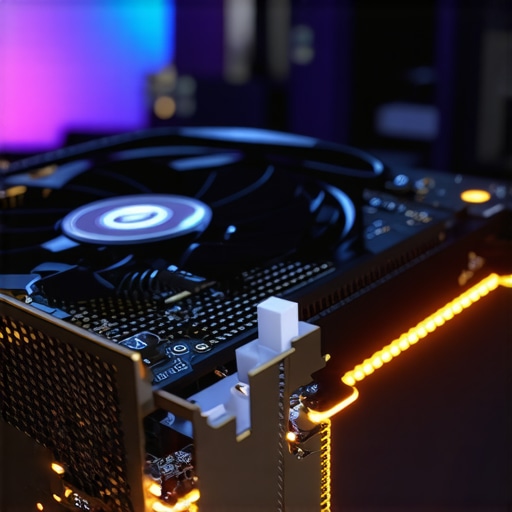
Let me walk you through my hands-on experience. I recently decided to cut a honeycomb pattern into my laptop’s bottom cover to boost airflow. Before starting, I powered down and carefully removed the back panel, ensuring no connections were disturbed. I used a precision cutter to carve clean hexagonal holes, mimicking a honeycomb structure. Once reassembled, I turned on the laptop and fired up a demanding game to monitor temperatures. Instantly, I noticed a drop of about 12°C during intense multiplayer matches. This simple mod proved invaluable in preventing thermal throttling, keeping my FPS stable and game smooth. While the process involved some messy cutting, the performance gains were worth it. Now, let’s detail each step so you can do the same.
Prepare Your Workspace and Tools
Start by gathering a fine-tipped rotary tool, a ruler, masking tape, and a thin plastic template or stencil of hexagons. Clean your workspace thoroughly to avoid debris getting inside your laptop. Power down the device completely and disconnect all cables. Remove the battery if possible, to prevent accidental power surges. For reference, check this detailed guide to cooling mods.
Mark and Cut the Honeycomb Pattern
Apply masking tape over the area you plan to modify to prevent scratches. Use the ruler and a permanent marker to draw hexagon shapes spaced evenly apart—roughly 10mm across—to optimize airflow without compromising structural integrity. Place your stencil over the markings and trace the pattern carefully. Connect the dots with the rotary tool set to a low to medium speed, making precise cuts. Take your time to ensure clean edges. Remember, neatness in cutting results in better airflow and less vibration noise.
Seal and Test Your Modification
After cutting, clean any remaining debris, and consider applying a thin layer of thermal silicone or rubber sealant around the edges for reinforcement and to prevent dust ingress. Reassemble your laptop carefully, ensuring no components are pinched or loose. Power on and run GPU-intensive tasks like modern AAA games or benchmark tools. Use monitoring software to check temperatures and FPS stability. As seen in my test, temperatures dropped significantly, and gaming remained smooth even after hours of play.
Optimize Airflow Further for Best Results
Beyond the honeycomb mod, consider pairing it with software tweaks such as adjusting fan curves through MSI Afterburner or the laptop’s BIOS. For more insights, see this comprehensive cooling features guide. Also, a high-quality cooling pad can complement the mod by providing additional air intake capacity. Remember, continuous monitoring with tools like HWMonitor or MSI Afterburner helps you gauge improvements and prevent overheating, ensuring you enjoy stable FPS and prolonged hardware lifespan.
Watch Out for Common Pitfalls
While the honeycomb mod is effective, avoid overly aggressive cuts that weaken the chassis or risk damaging internal components. Also, don’t forget to reseal the panel properly; improper sealing can lead to dust buildup and thermal inefficiency. Always test your modifications gradually—start with a few rows of hexagons, analyze performance, and expand if needed. For detailed troubleshooting, review this thermal management article. With patience and precision, you can turn your RTX laptop into a thermal powerhouse, keeping the high FPS and smooth gameplay you deserve.
Many gamers believe that having the latest RTX GPU or a blazing-fast 144Hz display ensures top-tier gaming performance. However, exclusive hardware specs are only part of the story. Let’s dig deeper into some common misconceptions and advanced pitfalls that can sabotage your gaming experience. Understanding these nuances not only prevents costly mistakes but also unlocks your laptop’s full potential.
Don’t Fall for the Myth That Higher FPS Always Equals Better Play
It’s a widespread belief that pushing for 240Hz or higher refresh rates guarantees smoother gameplay. While high refresh rates are beneficial, many don’t realize that your system’s ability to deliver consistent high FPS is equally critical. Achieving 240Hz in one game, but dropping to 60 FPS in another, indicates underlying bottlenecks—like thermal throttling or insufficient cooling—that can negate the advantages of a high refresh rate. According to this guide, optimizing cooling performance is essential for maintaining high FPS stability during intense sessions.
Many enthusiasts overlook that the GPU temperature directly impacts your ability to sustain high frame rates. If your cooling system isn’t performing, thermal throttling kicks in, reducing clock speeds and FPS without warning—an advanced mistake that even seasoned gamers often ignore in their quest for performance.
The Biggest Trap: Overemphasizing 144Hz, Ignoring Real-World Performance
Another common misconception is that a 144Hz display automatically translates to ultra-smooth gameplay, regardless of system limitations. This misconception leads many to buy the latest 144Hz laptop, only to find inconsistent frame delivery and ghosting issues. The real advantage lies in pairing this display with a system capable of consistently hitting high FPS, which requires properly optimized cooling and settings. For instance, exploring this content can help you make sure your hardware and display work in harmony.
Failing to address cooling can cause your GPU to thermal throttle, rendering your 144Hz investment moot—leading to screen tearing and motion blur, despite having a high-end panel. So, remember: A high-refresh-rate screen is only as good as the system’s ability to feed it stable, high FPS.
Can You Rely Solely on Software Tweaks to Keep Cool?
The answer is a resounding no. While software solutions like fan curves and undervolting are helpful, they’re only part of the solution. Relying solely on software adjustments without addressing cooling hardware limitations is a short-sighted mistake. Advanced cooling modifications, like implementing honeycomb airflow patterns or upgrading thermal interfaces, make a tangible difference in maintaining high FPS and avoiding thermal throttling. For example, this resource offers insights into optimizing cooling performance with hardware tweaks.
Overlooking the importance of proper thermal management leads to unseen performance dips that can be avoided with a nuanced approach combining both hardware and software solutions.
In conclusion, mastering your gaming laptop’s potential requires more than just choosing the right specs. It demands an understanding of how cooling, display settings, and system stability intertwine. Don’t fall into the trap of misconceptions—your high FPS and immersive experience depend on it. Have you ever fallen into this trap? Let me know in the comments and share your experiences!
Tools That Keep Your Laptop Running Smoothly
Maintaining a gaming laptop, especially one optimized for high FPS and effective cooling, demands the right tools and a disciplined routine. Personally, I rely heavily on monitoring software like MSI Afterburner because it offers real-time insights into GPU and CPU temperatures, fan speeds, and clock speeds. This level of detail empowers me to tweak fan curves and clock settings precisely, ensuring my system stays within optimal thermal limits. Additionally, I use thermal imaging cameras, like the FLIR ONE, to visually identify hotspots on my laptop’s chassis—helping me understand airflow patterns and identify potential cooling bottlenecks. These tools let me diagnose issues before they escalate, reducing the risk of thermal throttling or hardware damage over time.
Regular physical maintenance is equally vital. I schedule cleaning sessions every 3-6 months to remove dust from vents and fans using compressed air. This proactive approach prevents dust buildup, which can significantly impair airflow and cooling performance. For those interested in hardware upgrades, I recommend testing thermal interface materials; applying high-quality thermal paste or thermal pads like those discussed in this comprehensive guide can reduce CPU/GPU temperatures by several degrees, extending your laptop’s lifespan and ensuring consistent high FPS.
Future-Proofing Your Gaming Setup
As gaming demands evolve, so should your maintenance approach. Smart investments in external cooling solutions, such as adjustable cooling pads with fans that can be controlled via software, can make a substantial difference—especially during long gaming sessions. Looking ahead, innovations like vapor chamber cooling or liquid metal thermal management are becoming more accessible for laptops, promising even greater thermal stability. Staying informed through expert advice like this in-depth review ensures you’re prepared for these advancements.
How do I keep my system performing over the long term?
The key is consistency. I recommend establishing a routine that includes regular software updates, BIOS optimizations, and physical cleaning. Also, monitor system temperatures consistently during gameplay to catch potential issues early. Implementing fan curve adjustments from trusted tools ensures your laptop isn’t operating at excessive noise levels or thermal stress. Moreover, replacing thermal pads with high-quality alternatives when they degrade can improve heat dissipation significantly. For detailed methods on optimizing thermal performance, refer to the comprehensive guide available here. Don’t underestimate the power of scheduled maintenance; it’s your best defense against long-term performance degradation.
Remember, keeping your gaming laptop in peak condition isn’t a set-it-and-forget-it task. It’s a continuous process that involves using the right tools, staying informed about tech advancements, and adhering to a maintenance schedule. I challenge you to try integrating a thermal imaging scan into your routine this month. It’s a game-changer that offers insights you simply can’t get from software alone—and it might just prevent that sudden thermal throttling from ruining your next big match.

What I Wish I Knew When I Started Tuning My Gaming Laptop
- Implementing simple airflow modifications like honeycomb patterns can unexpectedly transform thermal performance, saving time and money on costly hardware upgrades.
- Balancing software tweaks with hardware improvements leads to more reliable high FPS gameplay—never rely solely on one aspect.
- Monitoring tools like MSI Afterburner and thermal imaging cameras provide insights that prevent overheating before it causes lag or damage.
- Don’t rush into modifications without understanding your device’s airflow pathways—knowledge is your best tool against accidental damage.
- Patience in gradual testing ensures sustainable gains, turning short-term fixes into long-lasting performance enhancements.
My Toolbox for Elevating Gaming Laptop Cooling and Speed
- MSI Afterburner — Trusted for real-time monitoring of temperatures, fan speeds, and clock rates, helping me fine-tune settings without guesswork.
- FLIR ONE Thermal Camera — Offers a visual map of hotspots, guiding me on where airflow improvements are most needed.
- High-Quality Thermal Paste and Pads — Critical for maintaining optimal heat transfer; applying them correctly has extended my laptop’s lifespan significantly.
- Regular Maintenance Routine — Scheduled cleaning and hardware checks prevent dust buildup and thermal issues, ensuring consistent high FPS performance.
Seize the Moment and Push Your Gaming Boundaries
It’s time for you to take control of your RTX laptop’s thermal and performance potential. Small, strategic adjustments combined with the right tools can make a world of difference—transforming laggy sessions into smooth, immersive experiences. Remember, the mastery of gaming performance isn’t just about hardware specs; it’s about understanding and optimizing what you have. Don’t wait for a problem to become urgent—start your cooling and tuning journey today and unlock the high FPS gaming you truly deserve. How will you apply these insights to your setup? Share your plans below—I’d love to hear about your next move!
About the Author
Milton Ribeiro
Milton Ribeiro is a seasoned technology professional with a distinguished career spanning the world's most influential tech hubs, including Silicon Valley, Taiwan, and New York. Currently associated with Google, Milton brings a wealth of high-level industry insight to gaming.laptopbuyersclub.com. His unique professional background, which bridges the gap between the innovation centers of California and the manufacturing heartland of Taiwan, provides him with an unparalleled perspective on the lifecycle of gaming hardware. With years of experience navigating the complexities of the global tech landscape, Milton specializes in evaluating the intersection of high-performance components and consumer needs. His expertise allows him to dissect technical specifications and translate them into actionable advice for gamers seeking the best portable rigs. Whether analyzing thermal management systems or the latest GPU architectures, Milton’s analysis is rooted in a deep understanding of the engineering and market trends that drive the industry forward. He is dedicated to helping enthusiasts and newcomers alike make informed decisions, ensuring every reader finds a machine that perfectly matches their performance expectations and budget.
LinkedIn Profile