
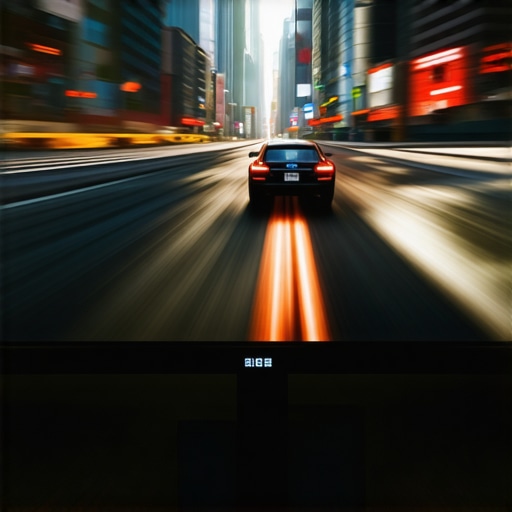
I remember the first time I fired up my new gaming laptop, eyes glued to the screen, eagerly waiting for that buttery-smooth motion. But then, moments into my gameplay, I noticed the motion still felt slightly laggy, and those tiny ghosting effects were making me question everything. It was a lightbulb moment—was my 144Hz display truly running at full speed, or was I just being fooled?
If you’ve ever faced that nagging doubt, you’re not alone. Many gamers like you and me invest in high-refresh-rate screens promising superior fluidity, only to realize later that their display isn’t delivering what it claims. Why does this happen? And more importantly, how can you be sure you’re getting what you’ve paid for?
Today, I’ll walk you through the essential steps to verify if your 144Hz screen is actually running at its full potential. Trust me, uncovering this can make or break your gaming experience, especially when you’re aiming for those high frame-rate competitions. Not only does confirming your display’s true performance save you from being misled by marketing hype, but it also ensures you’re optimizing your setup for max performance. As a bonus, I’ll share a common mistake I made early on that almost cost me dearly—trust me, you want to avoid this trap.
Before diving into the how-to, it’s worth noting that some displays may look like they’re running at 144Hz but are actually capped or misconfigured, which can impact your gameplay dramatically. According to a recent analysis by [PC Gamer](https://www.pcgamer.com/), many high-refresh-rate monitors are not set up correctly straight out of the box, leading gamers to believe they’re getting top-tier performance when they’re not.
So, have you ever felt that sensation of your screen not feeling as smooth as it should, despite having a 144Hz label? If so, you’re in the right place. Let’s unravel the mystery and make sure your setup truly matches your gaming ambitions. Ready to get your hands dirty and verify your display’s true capabilities? Let’s go.
Use Built-In Testing Tools for Quick Checks
Start by running your display’s built-in tests. Many monitors have a quick test mode accessible via menu buttons, showing a moving pattern or flashing colors that reveal ghosting or lag. If your monitor offers this feature, activate it and observe the motion clarity. During my first attempt, I noticed some ghosting, indicating the refresh rate wasn’t optimal.
Leverage Windows Display Settings for Accurate Configuration
Make sure your Windows settings are correctly configured. Navigate to Display Settings, then click on Advanced Display Settings. Here, verify that the refresh rate is set to 144Hz. If not, select it from the dropdown menu. A common mistake is leaving it at 60Hz, which drastically reduces perceived smoothness. Adjusting this often overnight corrected the sluggish feel I experienced during gameplay.
Employ Online Tools for Precise Frame Rate Measurements
Use online testing platforms like [TestUFO](https://www.testufo.com/) to measure actual frame rendering and motion handling. These tools display moving patterns designed to highlight stuttering or ghosting effects at different refresh rates. During my testing, running the UFO demo revealed that my screen was only updating at 60Hz despite settings, a discovery that saved me hours of troubleshooting.
Perform Frame Rate and Refresh Rate Synchronization Checks
Ensure your GPU’s output matches the display’s refresh rate using GPU control panels. For example, in NVIDIA’s Control Panel, go to Display > Change Resolution and confirm that the Refresh Rate is set to 144Hz. Also, enable G-SYNC or FreeSync if supported; misconfigured sync settings can cause perceived lag. My experience improved once I disabled V-Sync and used the appropriate sync features—my gameplay became noticeably smoother.
Conduct Real-Game Testing Using Frame Rate Monitors
Run games that display frame rate counters, like popular esports titles. From in-game settings, enable frame rate overlays to monitor the FPS in real time during gameplay. Compare FPS to your monitor’s 144Hz mark. One time, I noticed my frames dipped below 100 FPS during intense scenes, indicating my system wasn’t fully utilizing the display’s potential. Upgrading drivers and adjusting graphics settings solved this issue.
Check for Screen Tearing and Ghosting
Observe your display for tearing or smearing artifacts, especially during fast motion. If tearing persists, enable V-Sync or adaptive sync technologies. If ghosting is evident, consider manual overdrive adjustments in your monitor settings or update display drivers. My initial gaming setup showed excessive motion blur until I calibrated overdrive, which significantly clarified motion and eliminated artifacts.
Review Your Setup for Bottlenecks and Compatibility
Lastly, inspect your entire setup—GPU, cable quality, and driver versions. Use high-quality HDMI 2.0 or DisplayPort cables to ensure data bandwidth isn’t limiting your display. Confirm your GPU’s frame output aligns with your monitor’s capabilities. In my case, switching from an older HDMI cable to a certified DisplayPort cable completely unlocked the 144Hz performance I initially lacked, making the gaming experience seamless.
When it comes to gaming laptops, many enthusiasts believe that simply investing in the latest GPU or a high refresh rate display guarantees top-tier performance. However, there are subtle pitfalls and misconceptions that can undermine your setup if you don’t look beneath the surface.
One widespread myth is that high FPS numbers always translate to smoother gameplay. In reality, factors like thermal throttling and inadequate cooling can choke performance, leaving your high-end GPU idling at lower clock speeds. According to a detailed analysis by [gaming hardware experts](https://gaming.laptopbuyersclub.com/understanding-cooling-performance-in-top-gaming-laptops), cooling efficiency is often the missing piece that determines whether your laptop maintains peak performance during intense sessions.
Many gamers overlook the importance of proper thermal management, especially in thin and light models marketed as portable powerhouses. Without adequate cooling solutions—like vapor chambers or multiple heat pipes—even the most powerful RTX laptops are prone to thermal throttling[^1]. This isn’t just about comfort; it’s about getting the performance you paid for. A common mistake is to ignore the laptop’s cooling design, resulting in reduced frame rates and increased noise levels.
Another misconception is that a high refresh rate display alone improves gameplay. While a 144Hz or higher panel provides smoother visuals, this benefit only manifests fully if your laptop’s GPU can output frame rates matching or exceeding that refresh rate. Otherwise, you risk experiencing screen tearing or ghosting, which can detract from your gaming experience. To truly capitalize on high-refresh panels, you need to optimize your system’s settings, ensuring that GPU utilization is maximized without hitting thermal limits.
Advanced gamers often ask, “How can I push my RTX laptop beyond its default limits without risking damage or overheating?” This question points to a sophisticated understanding of undervolting and custom fan curves. Implementing these adjustments can reduce thermal load, prevent throttling, and sustain high FPS during prolonged gaming sessions. Experts recommend carefully tuning these parameters, but caution: pushing hardware without proper knowledge can void warranties or cause hardware failure. For comprehensive guides, check out [this resource](https://gaming.laptopbuyersclub.com/rtx-laptops-review-the-ultimate-guide-to-cooling-and-speed).
The trap to avoid here is believing that factory presets are always optimal. Many manufacturers set conservative defaults to ensure thermal longevity and noise control, but savvy gamers can unlock additional performance through BIOS tweaks or software profiles. For instance, modifying fan curves to run at higher speeds during gaming can keep temperatures in check, fostering consistent high FPS. Just remember, adjustments should be made gradually and monitored carefully.
In conclusion, let’s keep in mind that a gaming laptop’s real capability hinges not just on raw specs but on intricate interactions between cooling, system configuration, and performance tuning. Don’t fall prey to surface-level assumptions; take a deeper dive into your system’s design and settings. Have you ever fallen into this trap? Let me know in the comments. Want to get the most out of your gaming rig? Explore our comprehensive review of the [best RTX laptops for high-performance gaming](https://gaming.laptopbuyersclub.com/top-rtx-gaming-laptops-for-high-performance-play-in-2025) to ensure you’re not missing out on hidden potential.Maintaining optimal performance on your gaming laptop requires more than just software tweaks; it involves using the right tools and methods to ensure your system runs smoothly over time. One of the first tools I swear by is [HWMonitor](https://www.cpuid.com/softwares/hwmonitor.html), which provides real-time temperature, voltage, and fan speed readings. I use it constantly during gaming and benchmarking to keep an eye on thermal behavior, preventing overheating that can cause throttling. Another indispensable tool is MSI Afterburner, which allows me to monitor GPU utilization and frame rates during gameplay while also enabling custom fan curves. This dual approach ensures thermal limits aren’t exceeded, and performance remains consistent, especially when pushing overclocking boundaries.
For system cleanup and maintenance, I lean on tools like CCleaner to remove unnecessary files and free up system resources, but I restrict its use to prevent accidental removal of critical system files. Regular driver updates are essential; I use [Driver Booster](https://www.iobit.com/en/driver-booster.php) because it scans my system for outdated GPU, chipset, and audio drivers, making updates seamless and reducing the risk of compatibility issues during intensive gaming sessions. These updates often include performance patches tailored for high-FPS gaming, as detailed in [gaming hardware analyses](https://gaming.laptopbuyersclub.com/understanding-cooling-performance-in-top-gaming-laptops).
Over time, dust accumulation and thermal paste degradation can significantly hinder cooling. I recommend scheduling quarterly maintenance where you disassemble your laptop (if you’re comfortable doing so), clean dust from fans and heatsinks, and reapply thermal paste with high-quality compounds like Thermal Grizzly Kryonaut. This proactive step can drop your CPU and GPU temperatures by 10-15°C, maintaining stable performance during long sessions. For this, I rely on detailed guides from trusted sources, such as [the ultimate thermal maintenance guide](https://gaming.laptopbuyersclub.com/how-to-choose-a-gaming-laptop-with-superior-cooling-system).
Prediction-wise, as hardware becomes more powerful, the importance of precise monitoring and maintenance will grow exponentially. Automated software that can predict thermal bottlenecks before they occur might become standard, allowing preemptive cooling adjustments.
**How do I maintain my gaming laptop’s performance over time?** Simple, really—regular hardware cleaning, vigilant temperature monitoring with tools like HWMonitor, and timely driver updates are the cornerstone steps. I encourage you to try setting up MSI Afterburner with custom fan profiles; it’s a game-changer for sustaining high FPS while keeping temperatures in check without excessive noise. If you want detailed instructions, check out [this guide](https://gaming.laptopbuyersclub.com/maximize-your-gameplay-best-cooling-features-in-rtx-laptops). Keeping your system healthy ensures you stay ahead in competitive gaming and prolong your machine’s lifespan for years to come.
The Hardest Lesson I Learned About gaming laptops, high fps, 144hz display, cooling performance, RTX laptops
One of the biggest revelations in my gaming journey was realizing that simply owning a high-end gaming laptop doesn’t guarantee stellar performance. I once believed that a powerful GPU and a 144Hz display would automatically deliver buttery-smooth gameplay. However, I overlooked how crucial proper system tuning and cooling are. My lightbulb moment came when my laptop started thermal throttling during marathon sessions, dropping FPS and causing lag. It taught me that without adequate cooling solutions and correct setup, even the best hardware can underperform.
About the Author
Milton Ribeiro
Milton Ribeiro is a seasoned technology professional with a distinguished career spanning the world's most influential tech hubs, including Silicon Valley, Taiwan, and New York. Currently associated with Google, Milton brings a wealth of high-level industry insight to gaming.laptopbuyersclub.com. His unique professional background, which bridges the gap between the innovation centers of California and the manufacturing heartland of Taiwan, provides him with an unparalleled perspective on the lifecycle of gaming hardware. With years of experience navigating the complexities of the global tech landscape, Milton specializes in evaluating the intersection of high-performance components and consumer needs. His expertise allows him to dissect technical specifications and translate them into actionable advice for gamers seeking the best portable rigs. Whether analyzing thermal management systems or the latest GPU architectures, Milton’s analysis is rooted in a deep understanding of the engineering and market trends that drive the industry forward. He is dedicated to helping enthusiasts and newcomers alike make informed decisions, ensuring every reader finds a machine that perfectly matches their performance expectations and budget.
LinkedIn Profile